Create a Private Cocoa Pods Library in ios – Step-by-Step
CocoaPods is a collaborative platform for developers utilizing Xcode to develop iOS applications. When working on your project, you can leverage pre-existing code from other projects or developers to enhance efficiency and save time; instead of manually researching how to integrate these pieces of code, CocoaPods steps in.
A podfile is a Ruby script written in a declarative DSL (domain-specific language) that defines the dependencies for your project. It specifies the external libraries or frameworks your project needs.
Table of Contents
- How to Generate podfile
- Create your library through terminal commands.
- Set up a private repository for your custom Cocoa Pods library
- Configure GIT in your Xcode for version control with the library
- Set up the terminal for smooth library validation and publishing private Cocoa Pods
- Integrate your private library into other iOS Swift projects for code reuse
How to Generate podfile:
- Open Terminal, and navigate to the project directory, and add the command "pod init" to generate podfile.
- Save the Podfile in the root directory of your Xcode project.
- Add your library name into podfile as "pod library name."
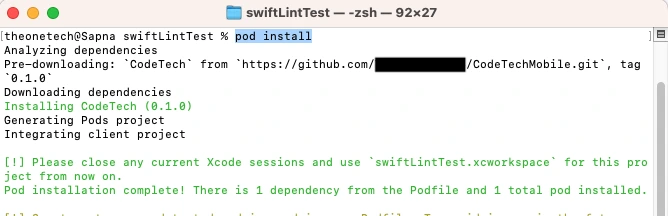
- Run the “pod install” command to install the specified dependencies.
The main benefit? You can use powerful features without the hassle of setting them up. It is like having a friend who finds the best tools for your job and makes sure they work smoothly on your project.
CocoaPods, an effective iOS dependency manager, typically integrates open-source libraries sourced from public and private repositories. However, there are situations where creating private CocoaPods libraries is beneficial. These private libraries provide enhanced code security, streamlined collaboration, version control, and the ability to customize solutions for specific projects.
CocoaPods is built with Ruby or Brew; it will be installable with the default Ruby or Brew available on macOS.
$ sudo gem install cocoapods
OR
$ brew install cocoapods
CocoaPods is like a project manager for your iOS app development. It takes care of the process when you want to bring in external code libraries to enhance your app. CocoaPods grabs that code and figures out if it needs any other pieces (dependencies) to work correctly. It is like assembling a team of superheroes for your project.
CocoaPods knows how to talk to different code storage systems (like git, svn, etc.), so it can fetch the source code from wherever it is stored. Once it has everything it needs, it rearranges your Xcode project and creates a special workspace for it. This workspace includes your original project, the external code, and a special project just for managing these external bits (the Pods project).

CocoaPods lets you decide how much assistance you want by running a specific command during installation. It is like having a personal assistant for your project, making things easier but letting you take the reins if you want to.
Create your library through terminal commands.
Step 1: Ensure that the folder for your library is blank and open a terminal within that directory.
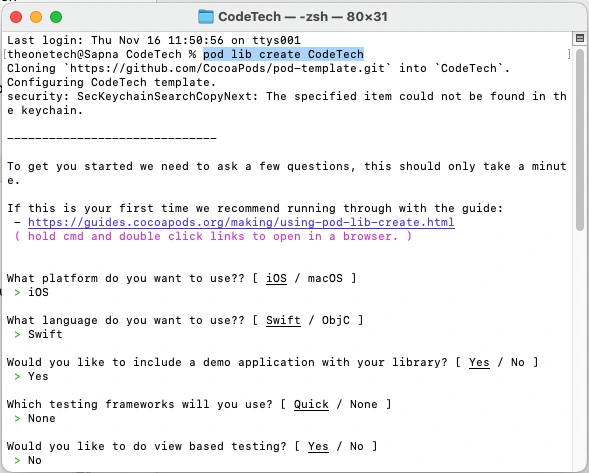
Step 2: Use the below-mentioned command to initiate the CocoaPods library creation process.
pod lib create <POD_NAME>
Step 3: Follow the question-and-answer prompts provided by the CocoaPods setup process, as shown in the accompanying screenshot.
Set up a private repository for your custom CocoaPods library.
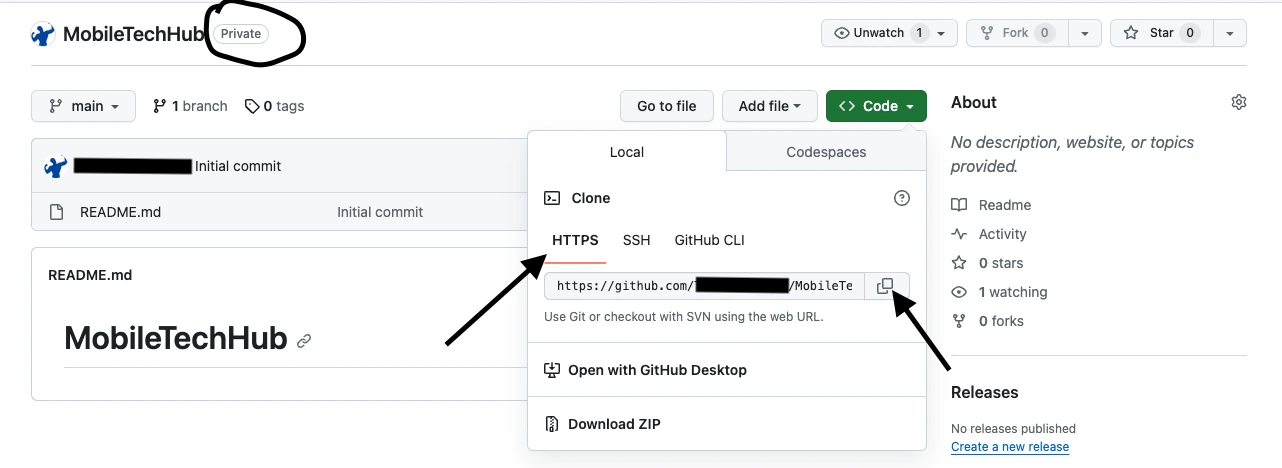
Step 1: Create an Account on GitHub, GitLab, or Bitbucket to create a new private repository.
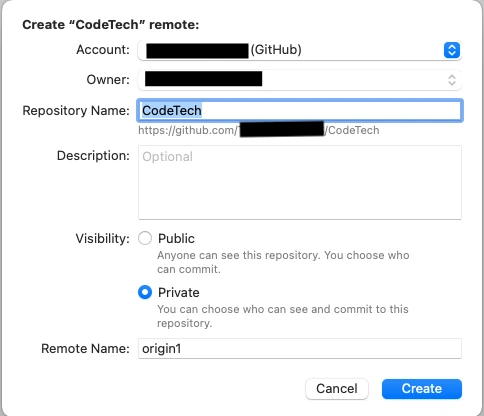
Step 2: Create a new private repository, ensuring it is marked as Private. You can provide a unique library name of your choice. Alternatively, you can use Xcode to create a new Private repository.
GitHub:
Xcode:
Configure GIT in your Xcode for version control with the library
Step 1: After creating the Xcode project using the previously mentioned command, open the terminal within the project directory and make the following changes:
Xcode Settings:
- iOS Deployment Target: 12.0
- Swift Version: Swift 5
- Project Format: Xcode 12-compatible
Podspec File Updates:
| Code in podspec file | Purpose |
| s.source_files = 'Classes/**/*' | Access .swift file |
| s.swift_version = '5.0' | Compatible version of swift |
| Classes folder | Delete replace me file and add classes folder |
| s.resources = “librayname**/*.{png,json}" | Access assets |
| s.resource_bundles = { 'librayname' => ['librayname/**'] } | Access storyboard |
| s.frameworks = 'UIKit', 'Foundation' | Access all controller's liker label, text field |
| s.dependency 'AFNetworking', '~> 2.3' | Access third party library’s |
Step 2: Place them in the 'assets' folder. You do not need to create a new folder for assets.
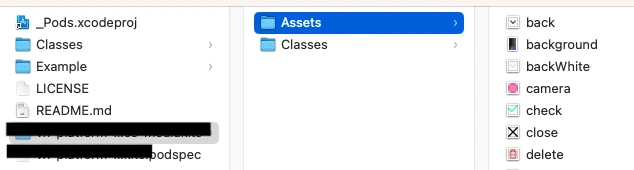
Step 3: Provide the framework bundle path for accessing images from code.
Step 4: Commit the changes and push them to the remote repository.
Step 5: Tag the version, Same as the podspec version mentioned, and push them to the remote repository.
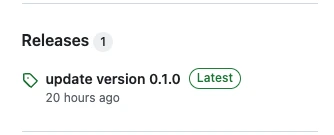
Step 6: Release the tag version at the remote repository. As mentioned below:

Set up the terminal for smooth library validation and publishing private CocoaPods.
Step 1: Add the mentioned command to verify the account.
pod trunk register <EMAIL> 'Author Name' --description='<USER_NAME>'
Step 2: Open your email account, click on verification email, and verify a link for creation following the library.
pod trunk me
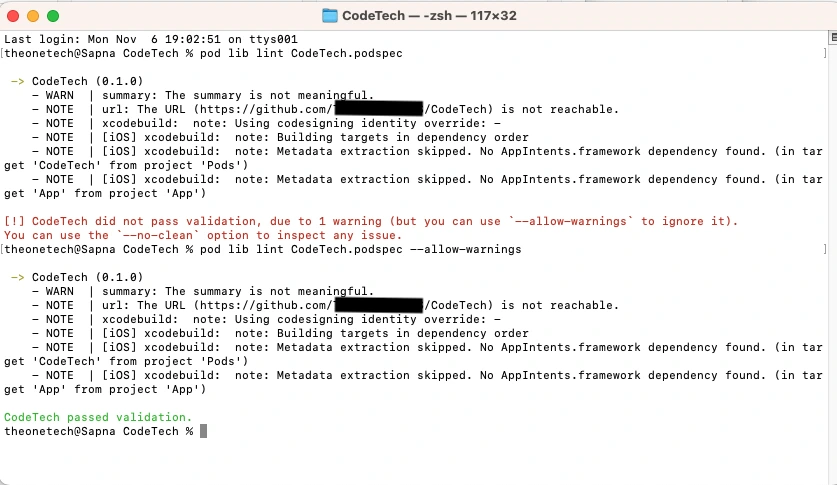
Step 3: Open the terminal from the library directory and validate the library
pod lib lint <POD_NAME>.podspec --allow-warnings
Step 4: Open a terminal from the library directory and publish the library
pod trunk push <POD_NAME>.podspec
Step 5: If you are facing an error due to multiple GitHub accounts or need to manage your credentials, consider these actions:
Remove all associated email and password entries from Keychain.
Access and other relevant locations.
Ensure your multiple GitHub accounts are correctly configured to avoid conflicts or credential issues.
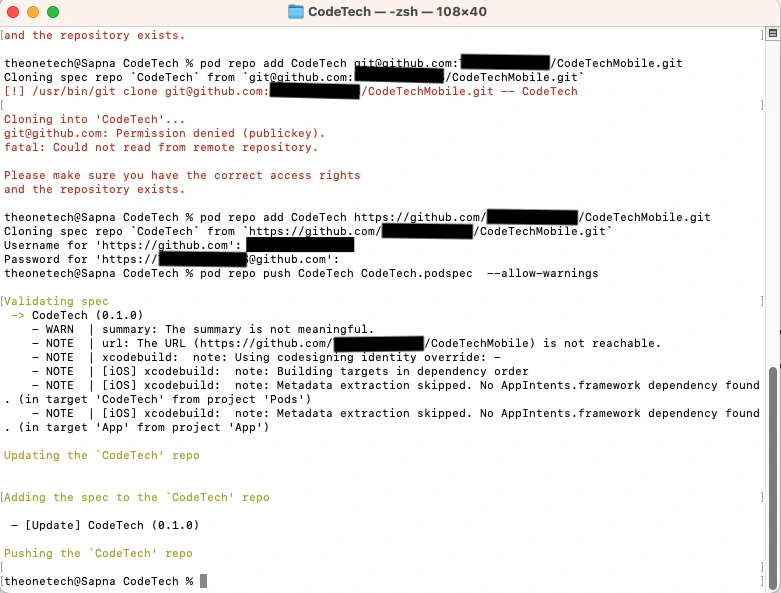
Step 6: Add repo private library
pod repo add <POD_NAME> <URL>.git
Step 7: Publish Private Library
pod repo push <POD_NAME> <POD_NAME>.podspec --allow-warnings
Integrate your private library into other iOS Swift projects for code reuse.
Step 1: Create a new Xcode project open terminal within the project directory folder and add the mentioned command
pod init
Step 2: Open the generated pod file, add a source URL, and pod name with tag or version as mentioned
Step 3: Update pod using the tag version as mentioned in the below screenshot

Step 4: Install Pods
Conclusion
This guide illustrates creating a private CocoaPods library for iOS using Swift, enhancing project code management. By adhering to these instructions, developers can effectively build and manage their proprietary code, promoting a structured and controlled environment for project dependency management.
So, what are you waiting for? Empower your business with our top-notch iPhone app development services and bring expertise to the table, ensuring your app stands out in the competitive market. Hire The One Technologies to bring your vision to life, delivering seamless, high-performance applications tailored to your needs.
Author Bio
 Sapana Chettipalli is a Senior iOS Developer at The One Technologies, bringing a wealth of experience and expertise to the team. Over the years, she has progressed into senior roles, playing a pivotal role in team and communication development. With a passion for traveling, drawing, yoga, and technology, Sapana envisions a future in leadership, aspiring to become a team lead, guiding junior developers, and contributing to impactful project architectures.