Dashboard Tile in NetSuite – User's Guide

NetSuite is one of the most powerful tools for business management. It helps businesses with various management and operational activities such as finance, customers support, order management, inventory management, human resource management, etc. There are multiple functions that can help you to manage your NetSuite account efficiently. Dashboard Tile is one of the features that can improve your efficiency.
There are three types of NetSuite dashboard tiles:
- Static
- Reminder
- Scorecard
Here is the user’s guide to creating dashboard tiles. There are three sections to follow
Table of Contents
- Section 1 - Dashboard Tile Bundle Installation
- Section 2 - Dashboard Tile Creation
- Section 3 - Add Tile to the Dashboard
Section 1 - Dashboard Tile Bundle Installation
To add Tiles to the Dashboard, we must install the bundle named Dashboard Tiles
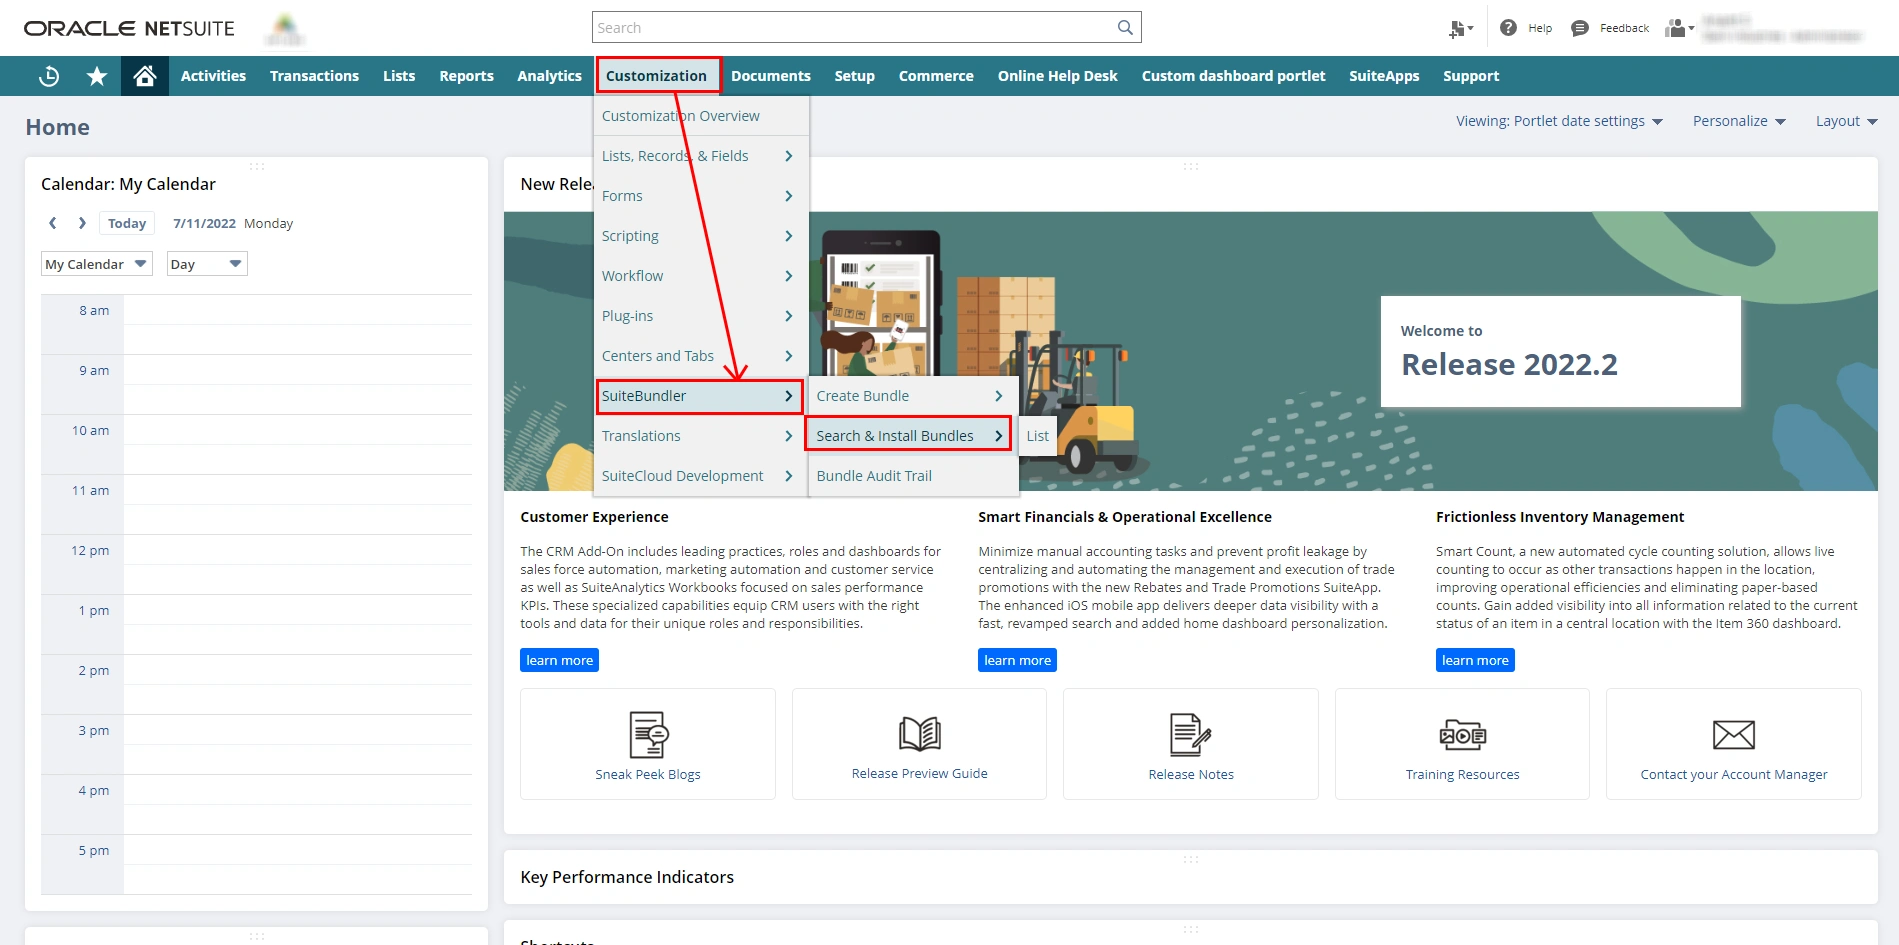
Step 1 - Navigate to Customization > Suite Bundler > Search & install Bundles
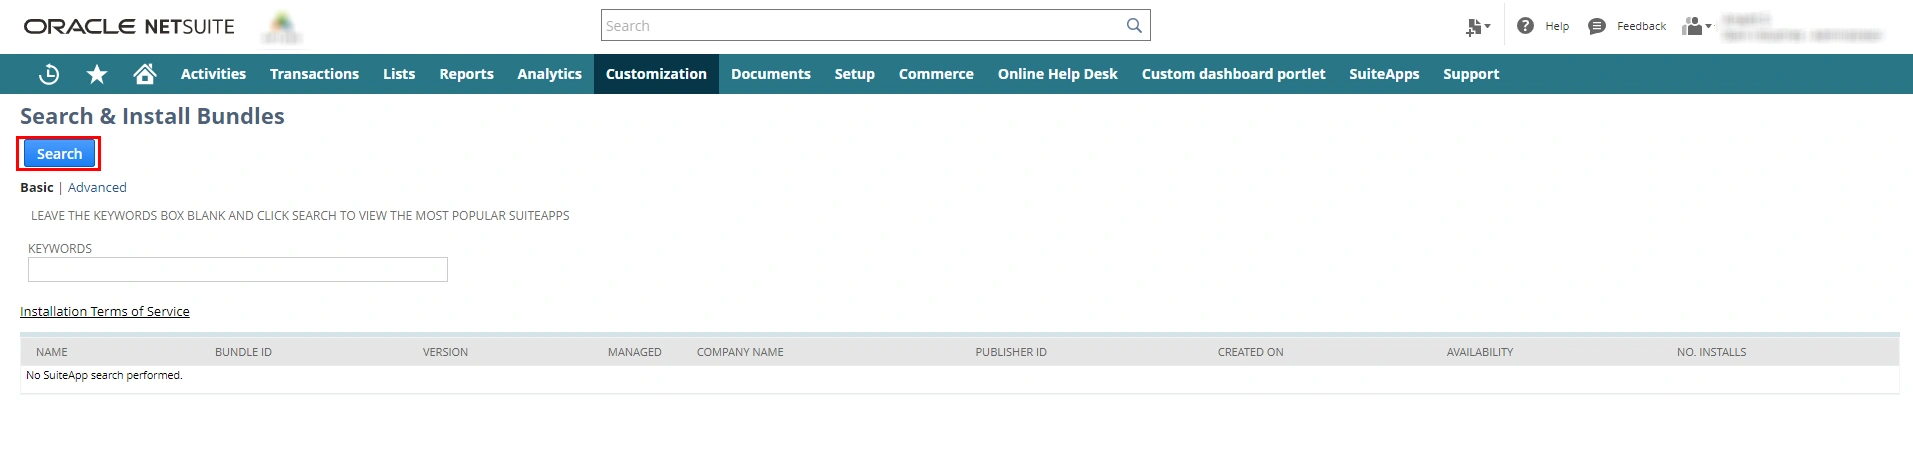
Step 2 - Once you click on “search & install bundles”, click on the “Search” button to get all bundles
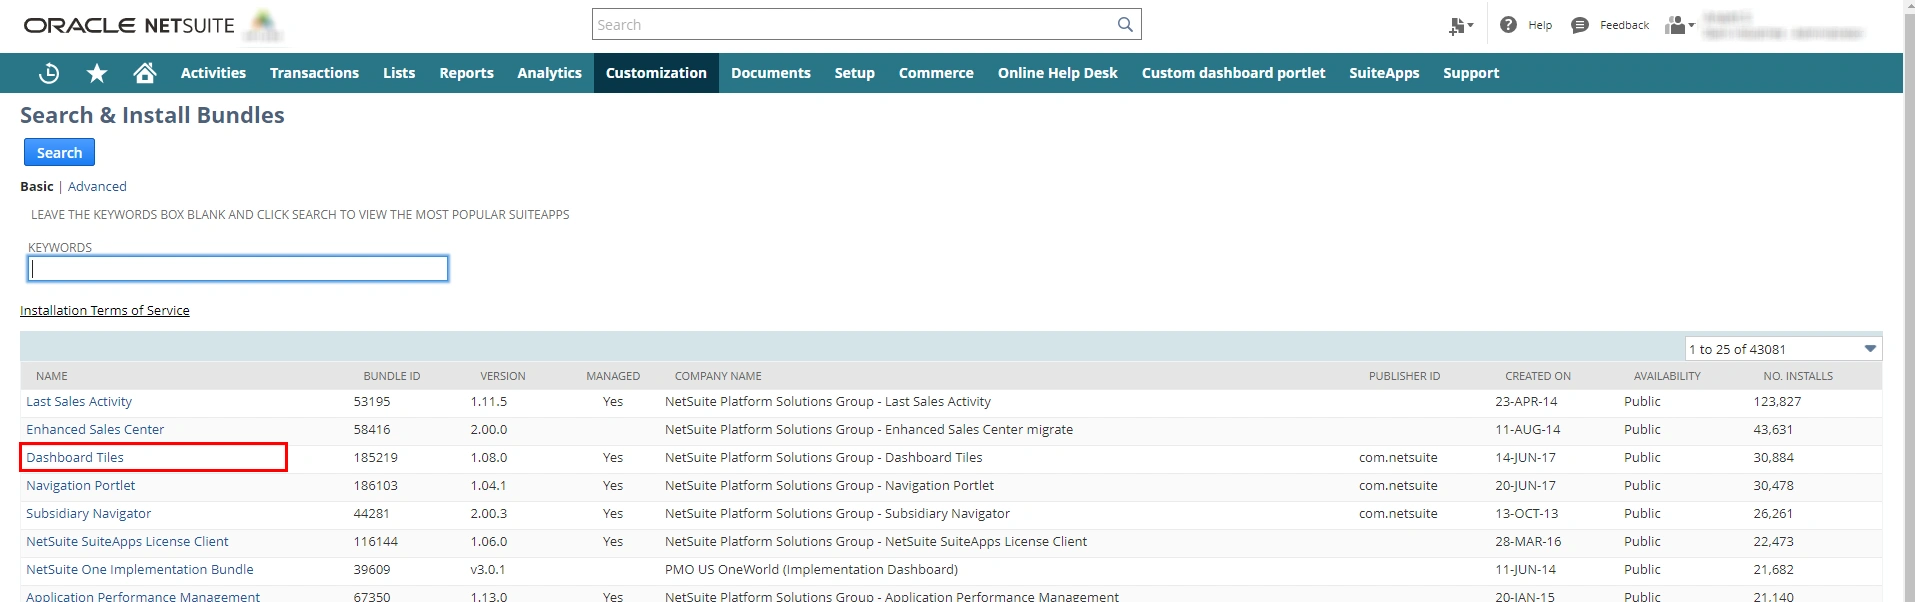
Step 3 - From the list of all bundles, select “Dashboard Tiles” bundle
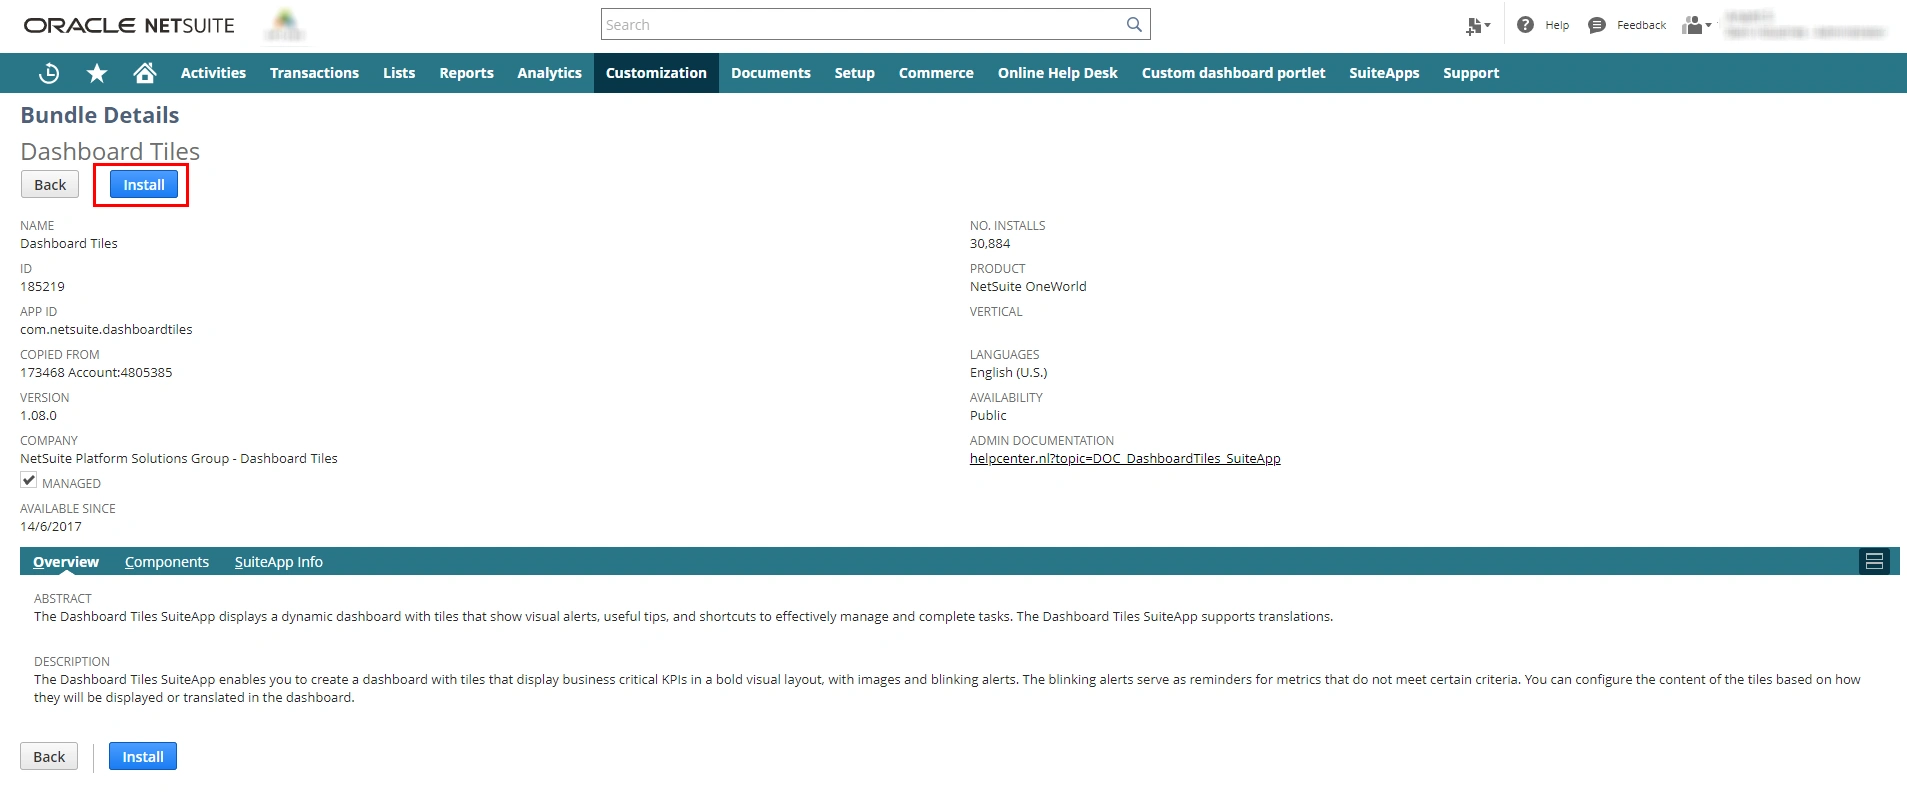
Step 4 - Click the “Install” button on the bundle details page
Step 5 - After that, Bundle Contents will appear on the screen. Now, click on “Install Bundle” to process further.

Once the bundle is installed in your NetSuite account, it will appear within the installed bundles’ list.
Section 2 - Dashboard Tile Creation
Before we add Tile to the NetSuite dashboard, we must create it.
Step 1 - Navigate to Setup > Dashboard Tile > Manage Dashboard Tiles > New
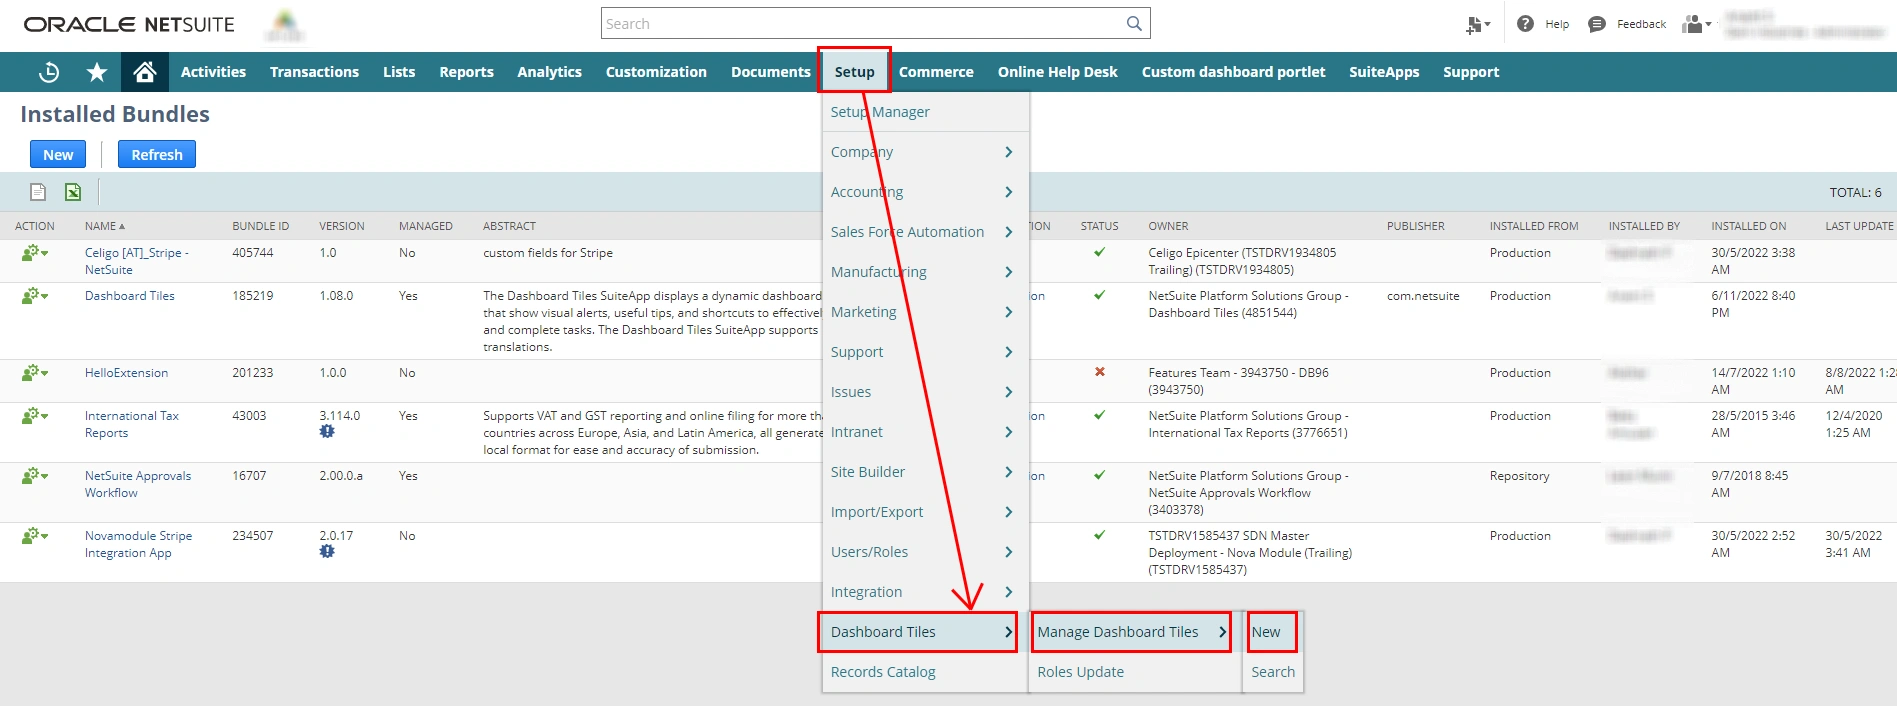
Step 2 - Fill in the required fields and Select Type
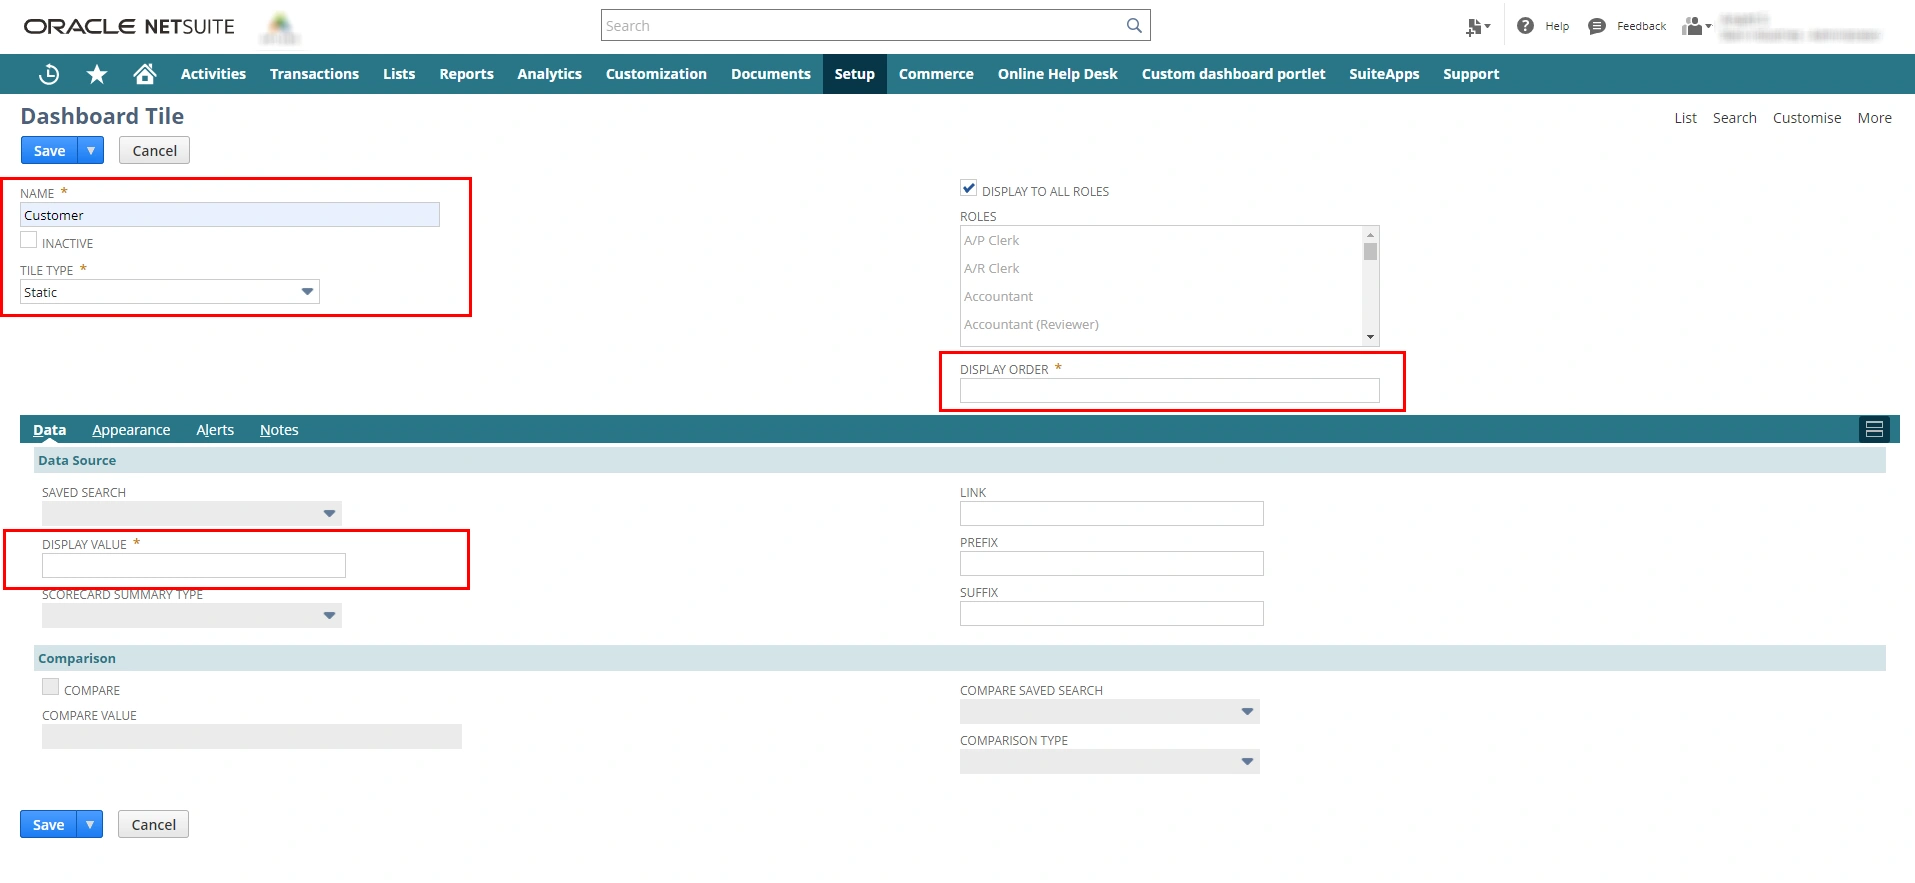
Step 3 - To change the appearance of the tile, go to the subtab “Appearance”. Set the color that you want in tiles and select one icon for the tile.
Step 4 - Once you click on the“save” button, Dashboard Tile will be created.
Section 3 - Add Tile to the Dashboard
We are set with bundle and tile, and now the time is to place it on the dashboard.
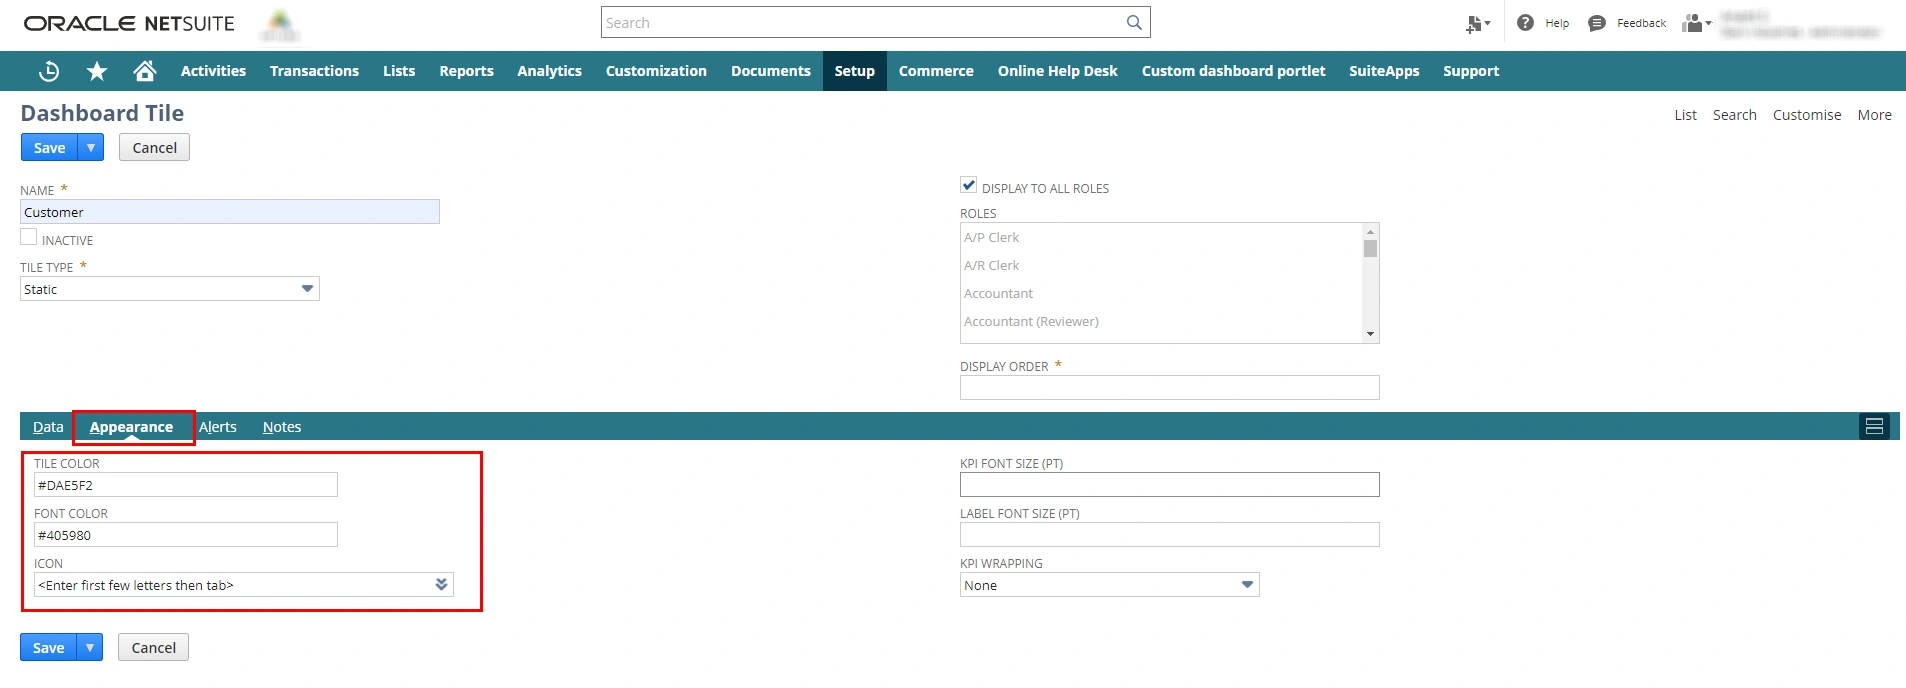
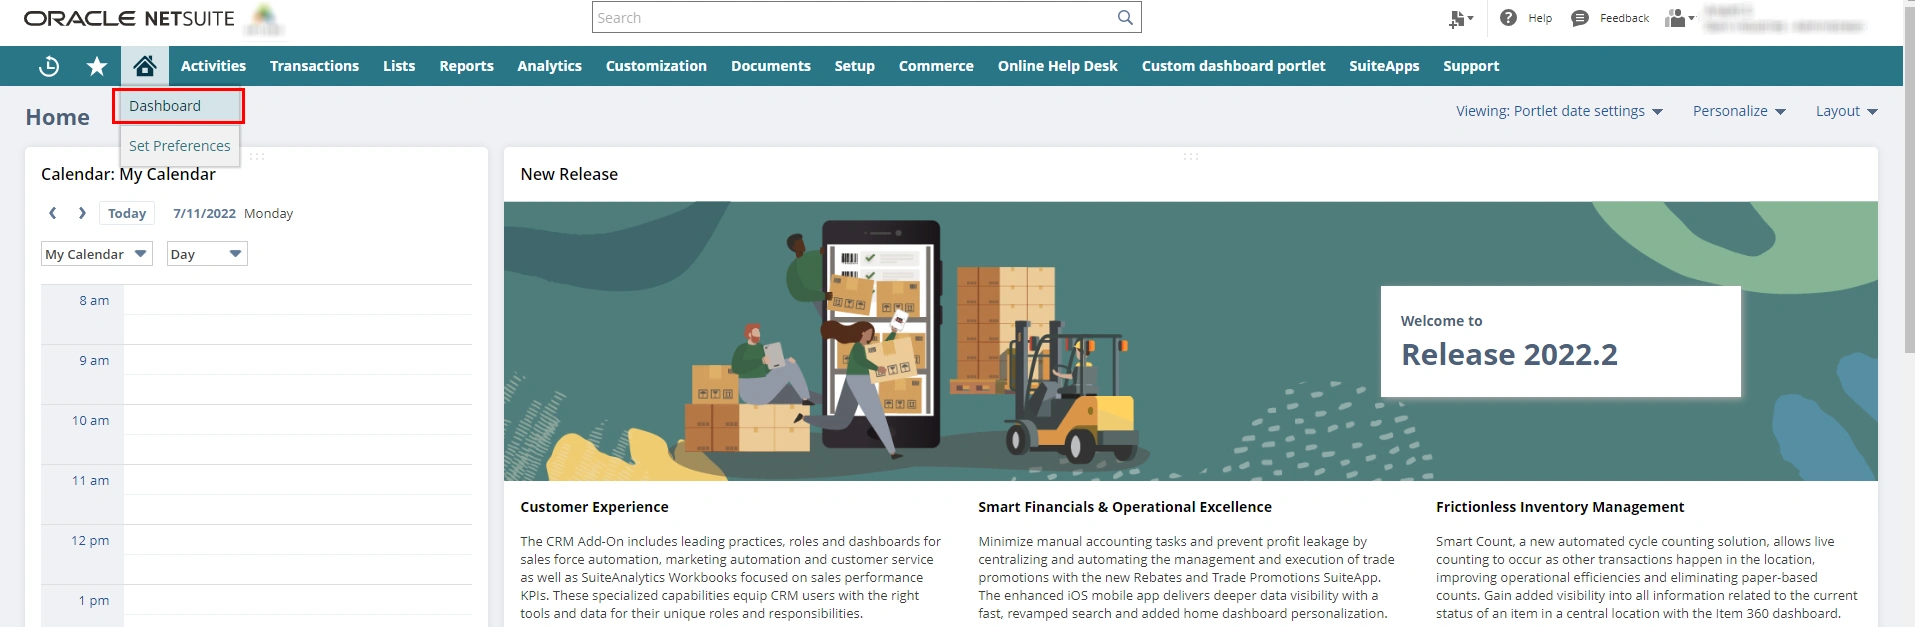
Step 1- Navigate to the home icon and go to the “Dashboard”
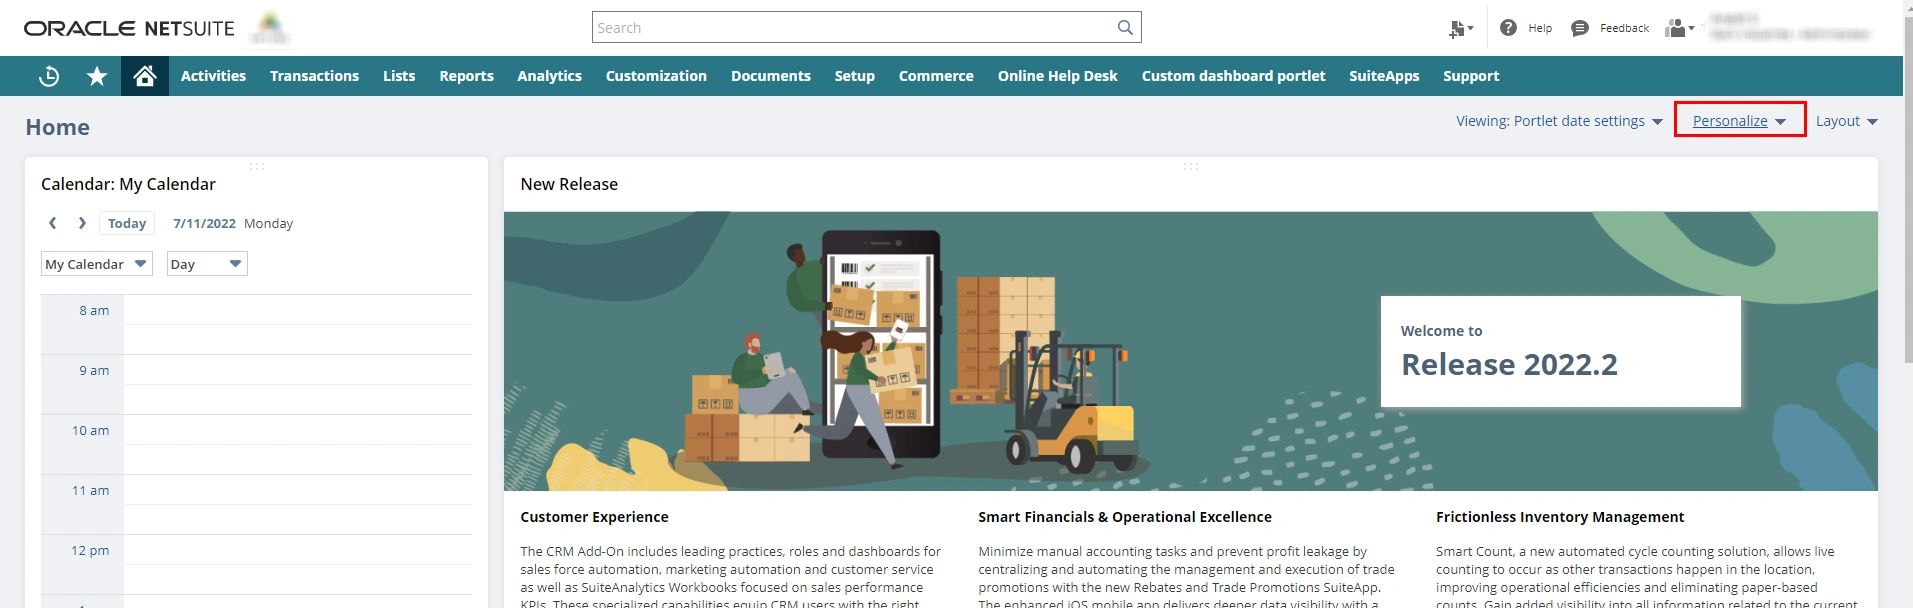
Step 2 - Click on “Personalize”, available at the top right corner below the menu bar.
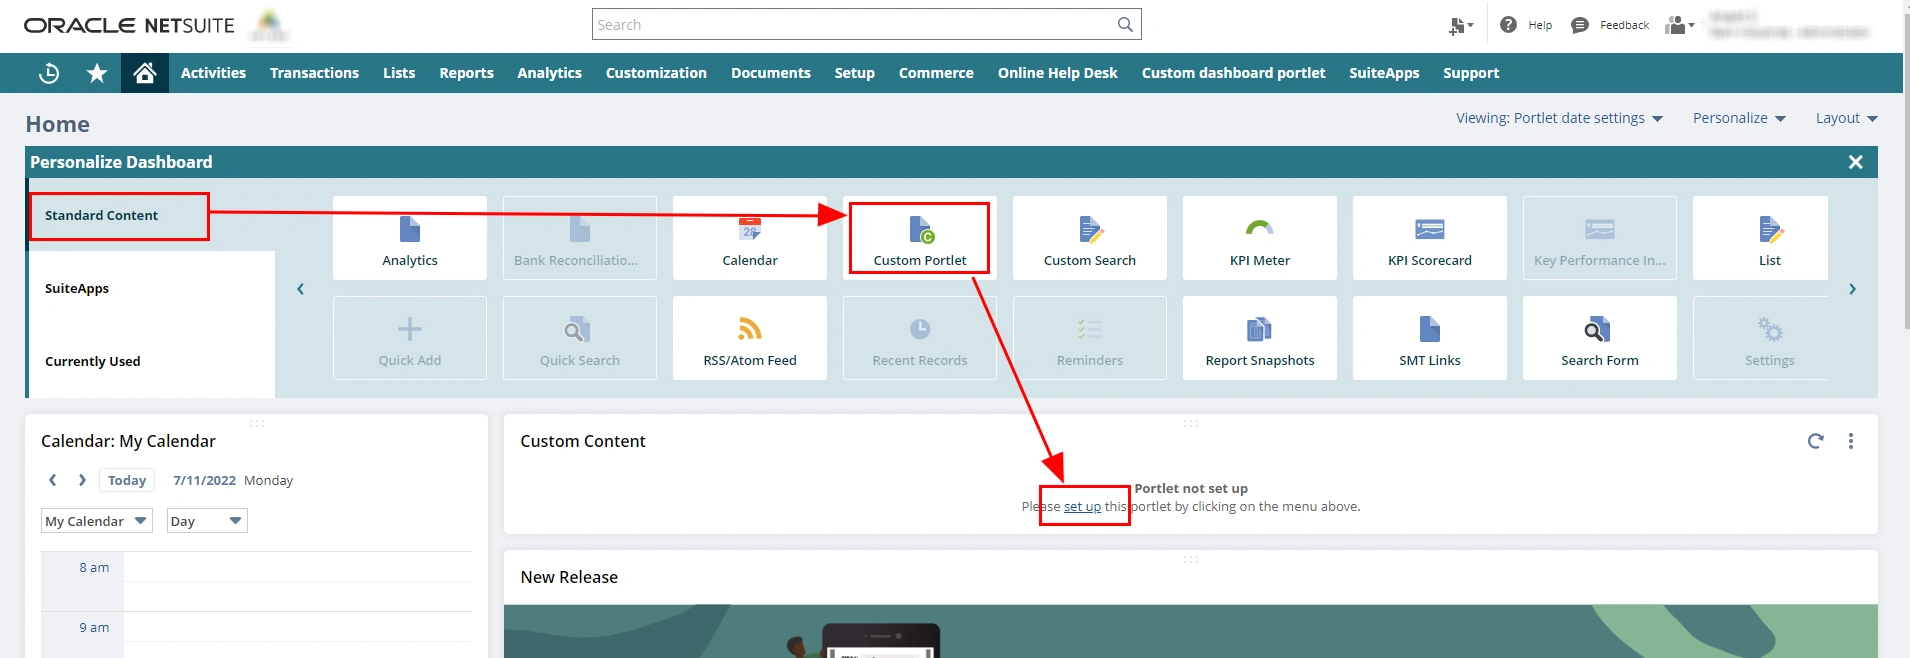
Step 3 - Click on “Custom Portal” from “Standard Content” and click on “set up” to proceed further with adding tile to the dashboard.
Step 4 - Select the given name of the dashboard tile (that has been added in section 2)from the dropdown and click on save.
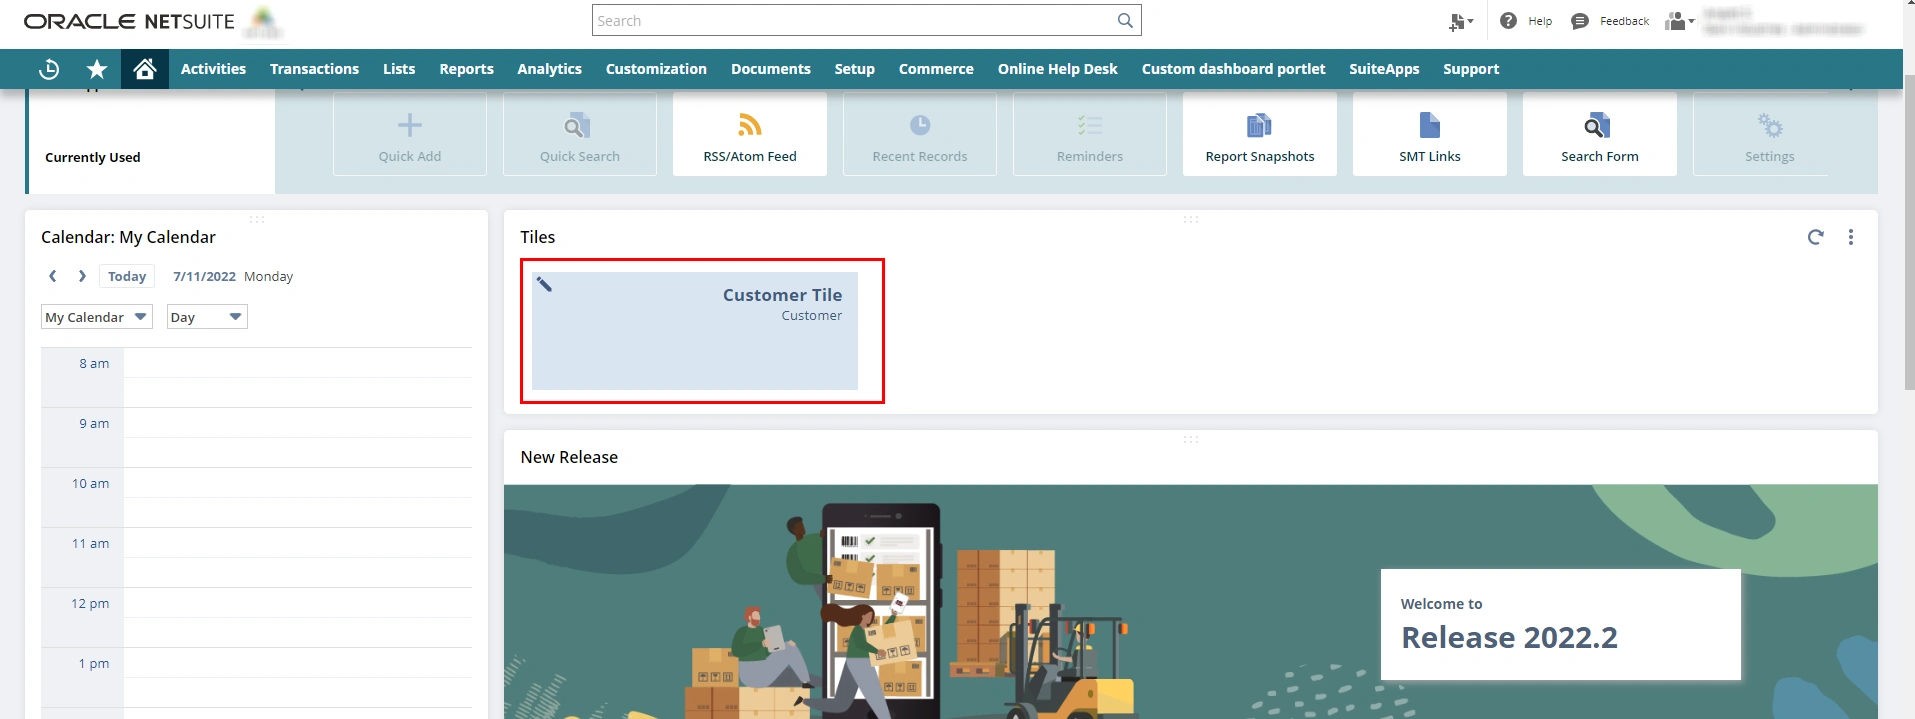
This is the final NetSuite dashboard screen with added tile.
We are a software development company that has experienced and trained developers. They can help you with efficient software development as well as integration. Get in touch with an IT services company with your requirements.