How to Add Redux Toolkit to Your React Typescript App
For React developers navigating the realm of TypeScript, incorporating the Redux Toolkit can be a game-changer in terms of state management. Redux Toolkit, an opinionated set of utilities designed to enhance the Redux library, empowers developers to write cleaner and more concise code while maintaining the robustness of their applications. This tutorial is a comprehensive guide to adding Redux Toolkit to your React TypeScript app, offering insights into the benefits of leveraging this library and demonstrating step-by-step instructions to seamlessly integrate it into your project.
This blog will help you to learn the redux toolkit with typescript. Basically, I used the redux toolkit for crud operation.
Table of Contents
- Introduction to Redux Toolkit
- Pre-requisite
- Difference between redux and redux-toolkit
- Technologies Used
- File structure for redux toolkit
- Installation of Redux Toolkit
- Setup Redux Toolkit
- Core Development Guide (CRUD Operation)
- Reference link for Redux Toolkit
- Conclusion
- Frequently Asked Questions
Introduction to Redux Toolkit
Redux Toolkit is a package that provides developers with a set of utilities for building Redux applications. It is designed to simplify and streamline the development experience by reducing boilerplate code and providing out-of-the-box support for common Redux use cases.

The Redux toolkit provides some options to configure the global store and create both actions and reducers in a streamlined manner.
The Redux toolkit has the following APIs:
- configureStore(): configureStore is used to create a Redux store that includes all the middleware and configuration options that are commonly used in a Redux application, such as redux-thunk, redux-dev tools-extension, and support for the serializable state. The function takes an object as an argument, which can be used to customize the behavior of the store.
- createReducer(): createReducer can be defined as a slice reducer function used to update a specific portion of the Redux store's state. It takes an initial state object and a set of reducer functions as arguments and returns a new reducer function that can handle multiple action types and update the state accordingly.
- createAction(): createAction is an action creator function that generates an action object when called. It takes a string that represents the action type as its argument and returns an action creator function that can be used to create actions of that type.
- createAsyncThunk(): createAsyncThunk can be defined as an asynchronous action creator function that generates one or more actions in response to an asynchronous operation, such as a network request. It takes two arguments: a string that represents the type prefix for the generated actions and an asynchronous function that returns a Promise.
- createEntityAdapter(): createEntityAdapter generates a set of reducer functions and selectors for a given entity type based on a schema that defines the shape of the normalized data. The generated reducers include functions for adding, updating, and removing entities and handle the creation of unique IDs for each entity.
- createSelector(): By using createSelector, you can define a selector that depends on one or more input selectors, and the result of the selector will only be recalculated if one of its input selectors changes.
Pre-requisite
Proper knowledge of react terminology: JSX, TSX, Function and Class components, State, Props, and Hooks
Familiarity with ES6 syntax and features.
Understanding of redux terms and concepts
Install the latest versions of the following:
- React
- React-Dom
- React-Router-Dom
- Typescript
- For styling, I used the Chakra-Ui package. (you can also use material UI, bootstrap, or any other package for styling).
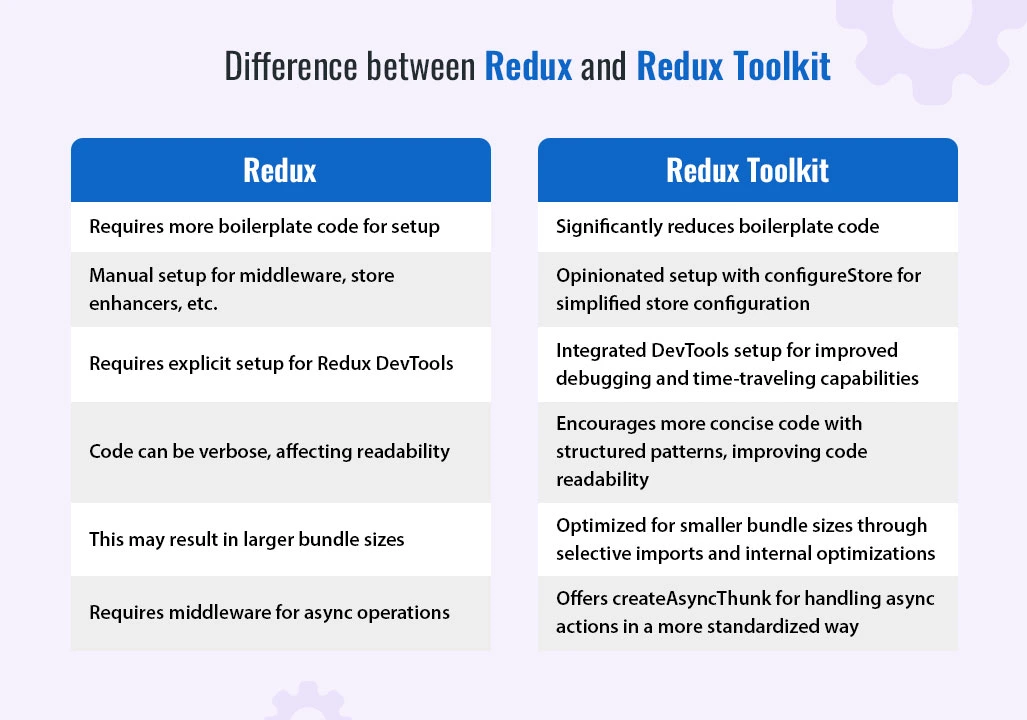
Difference between Redux and Redux Toolkit
Technologies Used
- React with typescript.
File structure for the redux toolkit

Installation of Redux Toolkit
- If App is Existing: npm install @reduxjs/toolkit --save
- Create New React App:
- npx create-react-app my-app –template redux (for javascript).
- npx create-react-app my-app –template redux-typescript(for typescript).
Setup Redux Toolkit
step-1: Create a Redux store.
import { configureStore } from '@reduxjs/toolkit';
import { bookSlice } from './bookSlice';

export const store = configureStore({
  reducer: {
    book: bookSlice.reducer,
  },
});

export type RootState = ReturnType<typeof store.getState>;
export type AppDispatch = typeof store.dispatch;
Source file link: Kuldippanchal2000 - redux_toolkit_with_typescript
step-2: Provide the Redux Store to react.
import { Provider } from "react-redux";
import { store } from "./redux/store";
<Provider store={store}>
 <App />
</Provider>
Source file link: Kuldippanchal2000 - redux_toolkit_with_typescript-index
step-3: Create a Redux state slice and actions.
import { createSlice } from "@reduxjs/toolkit";
import { RootState } from "./store";
import type { PayloadAction } from "@reduxjs/toolkit";
import { BookState } from "../types";

type initialStateType = {
  bookList: BookState[];
};
const bookList: BookState[] =
  JSON.parse(localStorage.getItem("userData") as string) ?? [];
const initialState: initialStateType = {
  bookList,
};
export const bookSlice = createSlice({
  name: "counter",
  initialState,
  reducers: {
    addNewBook: (state, action: PayloadAction<BookState>) => {
      state.bookList?.push(action.payload);
    },
    updateBook: (state, action: PayloadAction<BookState>) => {
      const {
        payload: { title, id, author },
      } = action;

      state.bookList = state.bookList.map((book) =>
        book.id === id ? { ...book, author, title } : book
      );
      localStorage.setItem("userData", JSON.stringify(state.bookList));
    },
    deleteBook: (state, action: PayloadAction<{ id: string }>) => {
      const newArr = state.bookList.filter(
        (book) => book.id !== action.payload
      );
       localStorage.setItem("userData", JSON.stringify(newArr));
      state.bookList = newArr;
    },
  },
});
export const { addNewBook, updateBook, deleteBook } = bookSlice.actions;
export const selectBookList = (state: RootState) => state.book.bookList;
export default bookSlice.reducer;
Source file link: Kuldippanchal2000 - redux_toolkit_with_typescript-book
step-4: Add slice reducers to the store.
import { configureStore } from '@reduxjs/toolkit';
import { bookSlice } from './bookSlice';
export const store = configureStore({
  reducer: {
    book: bookSlice.reducer,
  },
});
export type RootState = ReturnType<typeof store.getState>;
export type AppDispatch = typeof store.dispatch;
step-5: Use redux state and actions in react components.
import { addNewBook, updateBook,deleteBook } from "../redux/bookSlice";
import { TypedUseSelectorHook, useDispatch, useSelector } from "react-redux";
const useAppDispatch = () => useDispatch<AppDispatch>();
const useAppSelector: TypedUseSelectorHook<RootState> = useSelector;

const dispatch = useAppDispatch();
dispatch(updateBook({ author, title, id: ids }));
dispatch(addNewBook(userData));
dispatch(addNewBook(userData));

Core Development Guide (CRUD Operation)
For designing use chakra-UI (npm install --save @chakra-ui/react)
Use Router, Routes, and Route from (React-Router-Dom) for the routing in it.
Components
- Loader.tsx (shows the loader when the site is rendered.)
- Navbar.tsx (navigation bar in app.)
Pages
- AddBook.tsx (main page for crud operations.)
- DeleteBookModel.tsx(page for delete alert dialog.)
Redux
- Store.ts (Redux store)
- BookSlice.ts(Redux State Slice)
Create a Loader component for display loader for 2 seconds on rendering.
Source file link: Kuldippanchal2000 - redux_toolkit_with_typescript-loader
Create a Navbar using chakra-UI
import { Flex, Box, Text } from "@chakra-ui/react";
import { Link } from "react-router-dom";

const Navbar = () => {
  return (<Flex background="green.300" color="white"  fontSize="20"
      textDecoration="underline"
      display="flex"
      flexDirection="row"
      p={4}
    ><Box marginRight="10"><Link to="/"><Text>Home</Text>    </Link></Box></Flex>
  );
};

export default Navbar;
Source file link: Kuldippanchal2000 - redux_toolkit_with_typescript-navbar
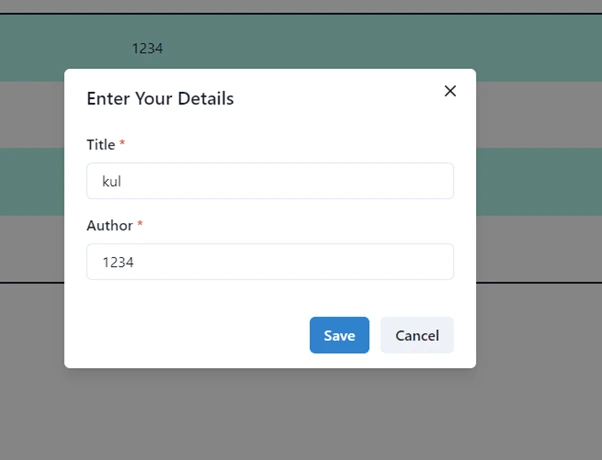
Create AddBook.tsx file for add, edit, and delete functionality.
Source file link: Kuldippanchal2000 - redux_toolkit_with_typescript-addbook

1. Add Book Data
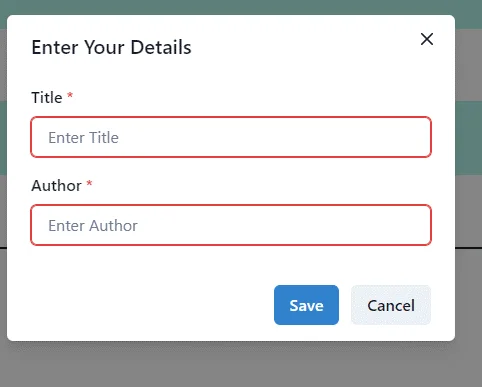
2. Edit Book Data
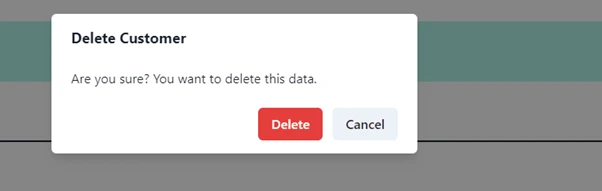
3. Delete Book Data
Source file link: Kuldippanchal2000 - redux_toolkit_with_typescript-deletebook
On submitting the add, edit, and delete buttons, data is stored in local Storage.
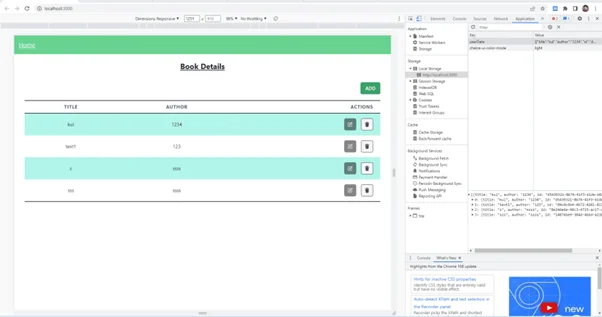
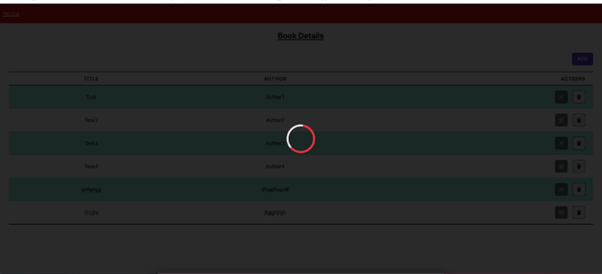
Get the data from local Storage and display it on the table of chakra UI
_638434027319757356.webp)
Final Output
_638434027320485027.webp)
Reference link for Redux Toolkit
Conclusion
Integrating Redux Toolkit into your React TypeScript application is a strategic move towards achieving streamlined state management and enhanced development efficiency. Redux Toolkit not only simplifies the complexities of state management but also offers a modernized approach to handling asynchronous operations, making it an invaluable tool for developers aiming to optimize their React TypeScript applications.
After following all the above mentioned steps, we hope your code is working as expected. To make your task even easier, we have created GitHub Repoat Kuldippanchal2000 - redux_toolkit_with_typescript. You can try the running demo app.
Frequently Asked Questions
How can your team assist in integrating the Redux Toolkit into our React TypeScript application?
Our experienced developers specialize in seamlessly incorporating Redux Toolkit into React TypeScript projects, optimizing state management, and enhancing overall application efficiency.
What benefits do hiring your services bring for Redux Toolkit integration in a React TypeScript app?
By choosing our services, you gain access to expertise that ensures a smooth integration process, reducing boilerplate code, improving scalability, and leveraging Redux Toolkit's powerful features for a robust application architecture.
Can your team help migrate an existing Redux setup to the Redux Toolkit in our React TypeScript app?
We offer services to smoothly transition your current Redux setup to Redux Toolkit, minimizing disruptions and enhancing your application's maintainability.
Can I continue using my existing Redux codebase when incorporating the Redux Toolkit?
Redux Toolkit is designed to be compatible with existing Redux code, allowing a gradual transition and providing additional tools to improve your development workflow.
How do your developers address potential challenges during the Redux Toolkit integration process?
Our skilled team is equipped to troubleshoot any challenges, offering proactive solutions to optimize the integration, and provide a robust foundation for your React TypeScript app.
Can you tailor the Redux Toolkit integration to our specific project requirements and business needs?
Our services are customizable to meet your unique project demands, ensuring that the Redux Toolkit integration aligns perfectly with your React TypeScript application goals.
Is there a performance impact when adding Redux Toolkit to a React TypeScript app?
Redux Toolkit is optimized for smaller bundle sizes, and its selective imports ensure that only necessary parts are included, minimizing any potential impact on performance.