How to Get Google App Client ID and Client Secret
Imagine accessing a secret data cache that could completely transform your industry. You can access this virtual treasure trove by entering your Google App Client ID and Client Secret. Success in today's technologically advanced world depends on harnessing the power of data. Understanding how to receive and use a client ID and secret key from Google is like possessing the key to countless opportunities, whether developing a mobile app or integrating Google services into your website.
If you ever need to integrate Facebook APIs in your web application, you can hire asp net developer or PHP developer from us at an affordable rate.
You will need the Google API Console project and Client ID to work with Google APIs, which you can use to call different Google APIs. I wanted to integrate Google Sign-in into my website. The following blog post explains how to create a Google API Console project, client ID, and client Secret.
Follow the below-mentioned steps to get the Google App Client ID and Client Secret from the Google Developer Console.
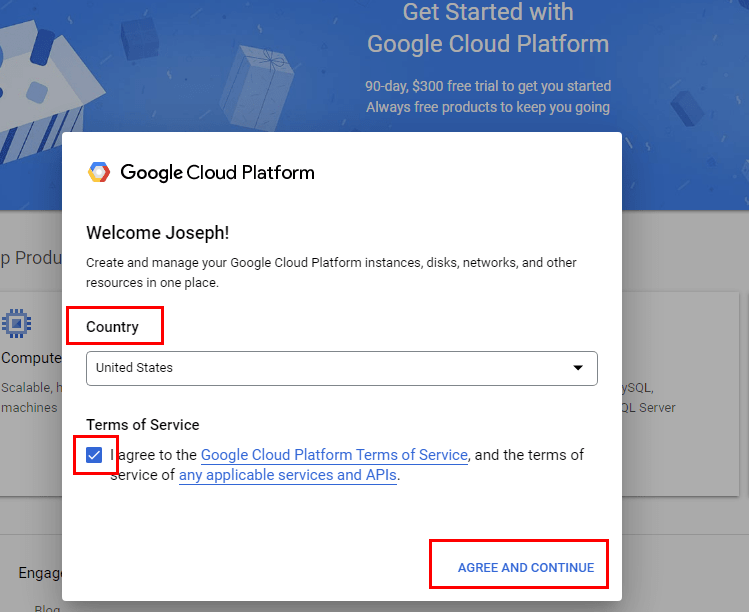
- Login to Google Developer Console using your Google account credentials.
- You need to accept the agreement if you are not registered on a Google developer account.

- After accepting the agreement or if you are already registered on a Google developer account, you will see a screen as shown below. Click on “Select a project” on the top header bar.
-
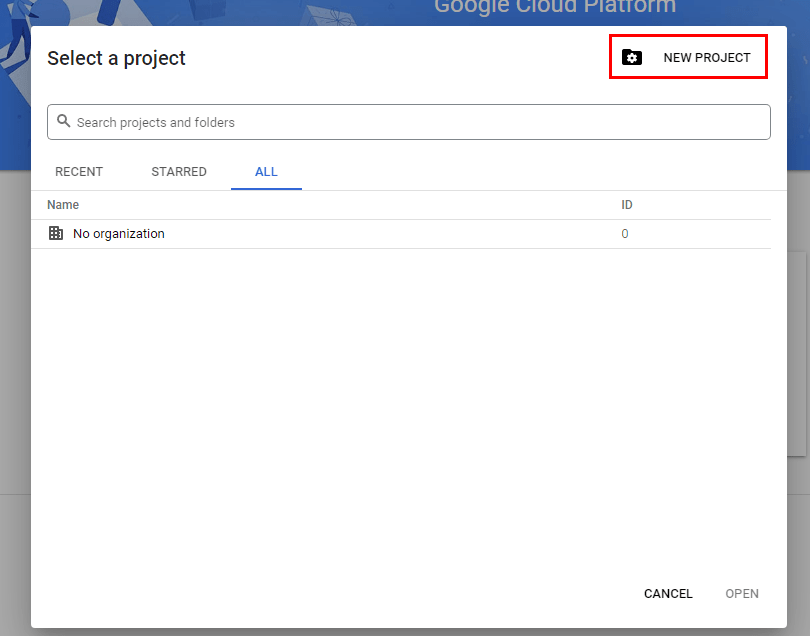
Click on the "NEW PROJECT" button from the project selection popup to add a new project.
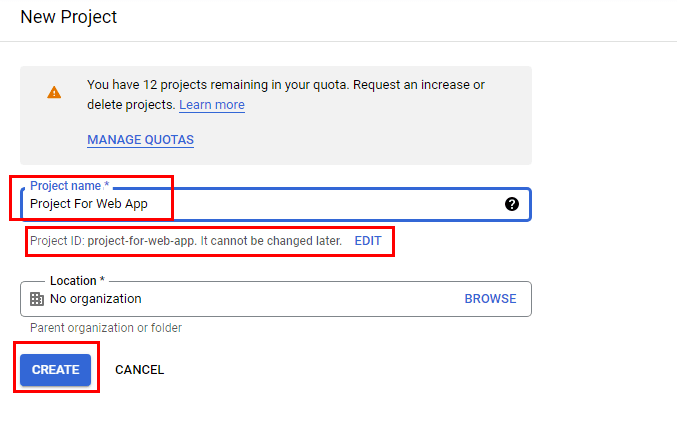
- Enter your “Project name” and click the “Create” button. You can also edit Project ID if you want to.
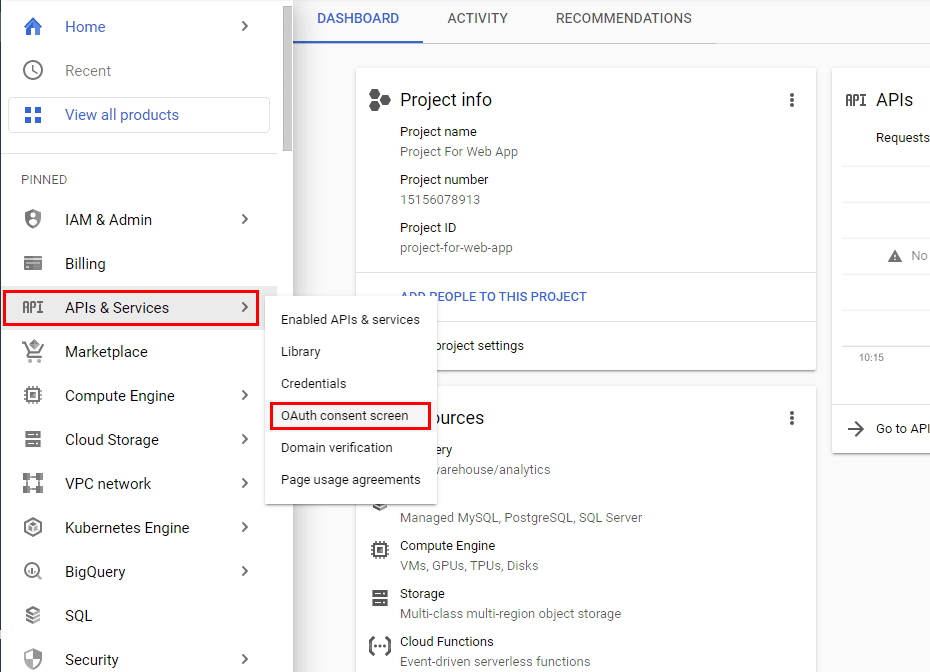
- Click on the “OAuth consent screen” by hovering the mouse on "APIs & Services" from the left side menu.
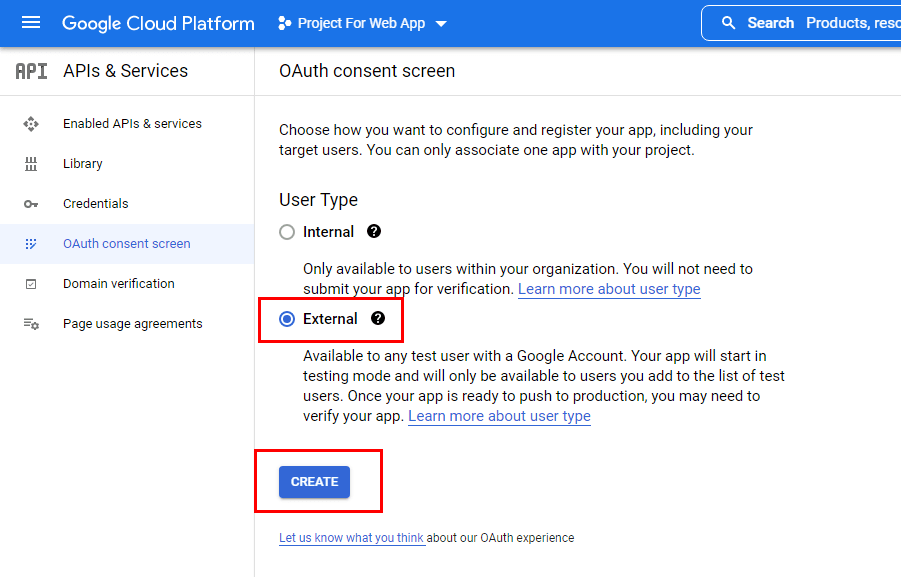
- On the “OAuth consent screen”, Choose User Type as per your requirement and click the Create button to process further.
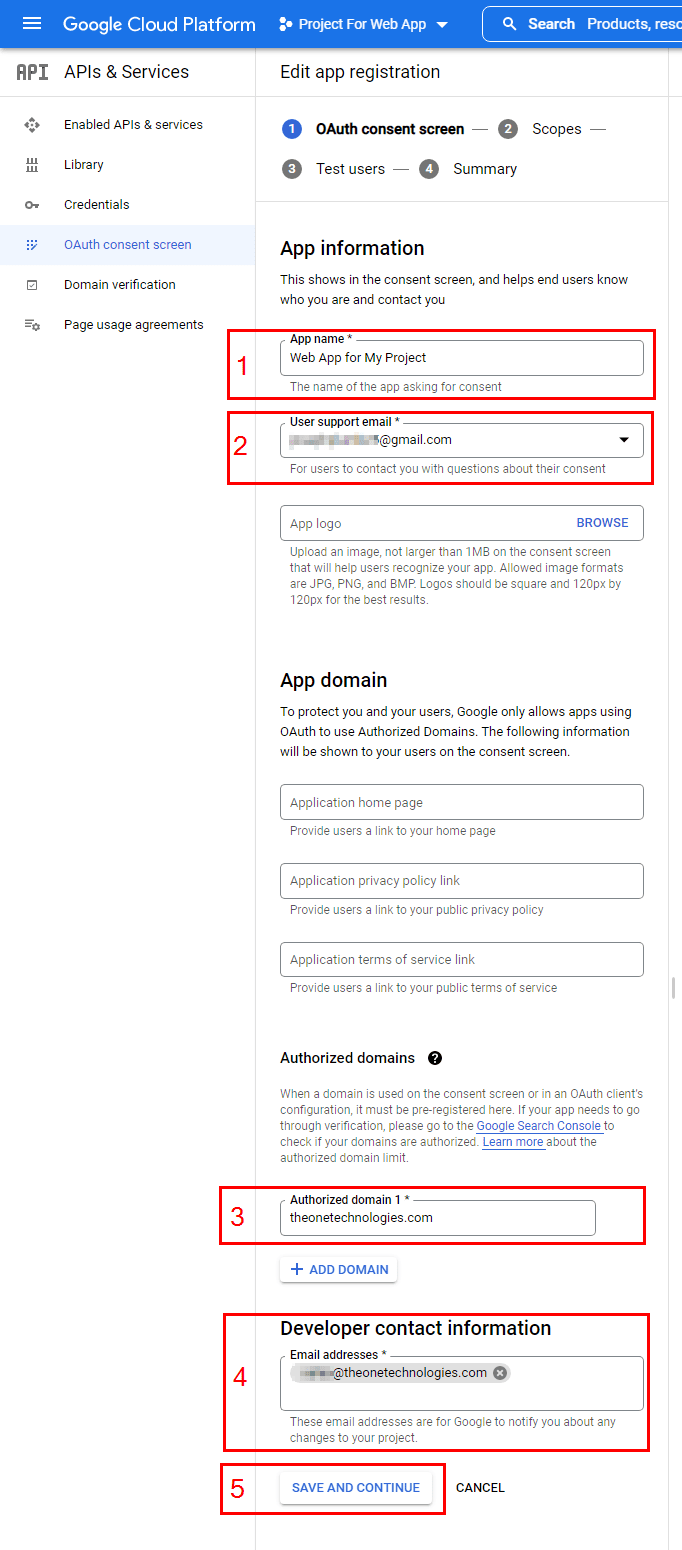
- Add Application name, select Support email, add Authorized domain and Developer Content Information. Then click on the Save and Continue button.
- After completing all 3 steps in OAuth Content screen, click on Back to Dashboard on Summary Step.
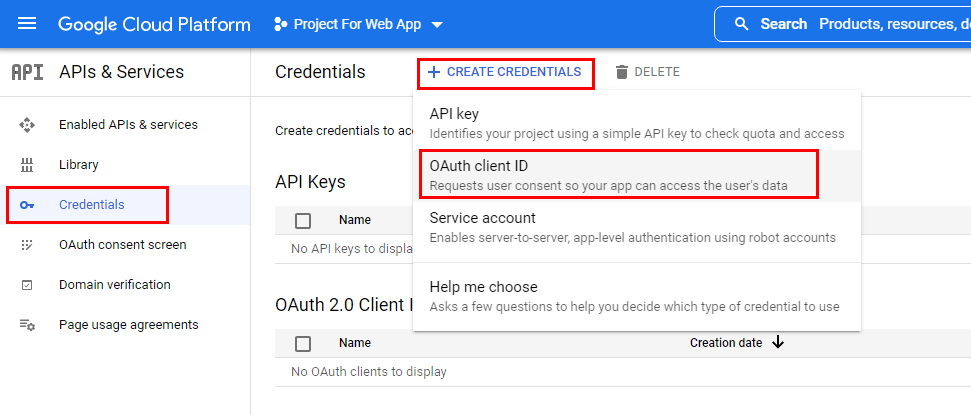
- After creating the project, click “Credentials” from the left side menu to open the Credentials screen, click “Create credentials,” and select OAuth client ID from the dropdown list.
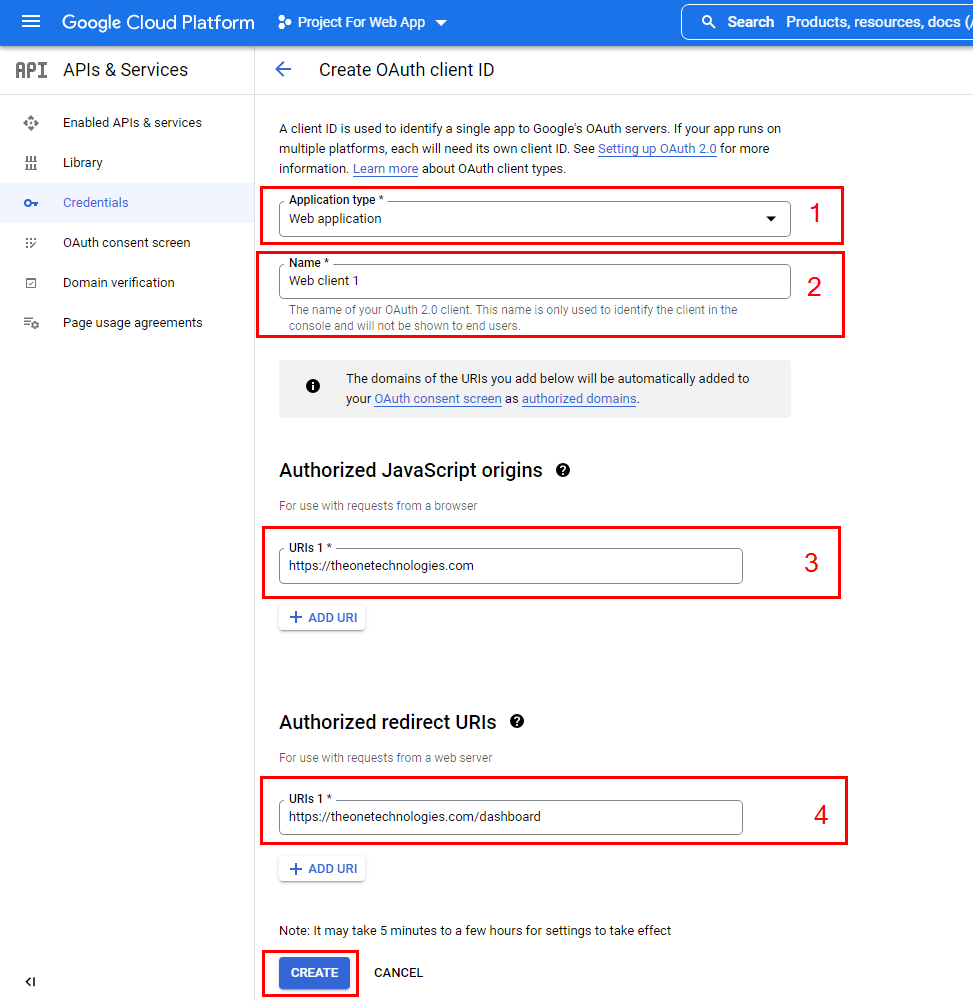
- On the OAuth client ID creation screen:
- Select the “Web Application” from the “Application Type” dropdown.
- Enter your OAuth 2.0 client name in the “Name” field. This name will not be shown to end users when they are asked to give login permission to your website.
- Enter your catalog site URL in “Authorized JavaScript origins”. For example, if the website domain is theonetechnologies.com, enter http://theonetechnologies.com
- In the “Authorized redirect URIs” input box, enter your website URL + the page/end-point where you wanted your user redirected back if you are using Microsoft.Owin.Security.Google library, the end-point is “/signin-google”. For example, my website URL is http://theonetechnologies.com, so I enter http://theonetechnologies.com/signin-google
- Click on the “Create” Button.
- It will display the popup with the client ID and client secret.


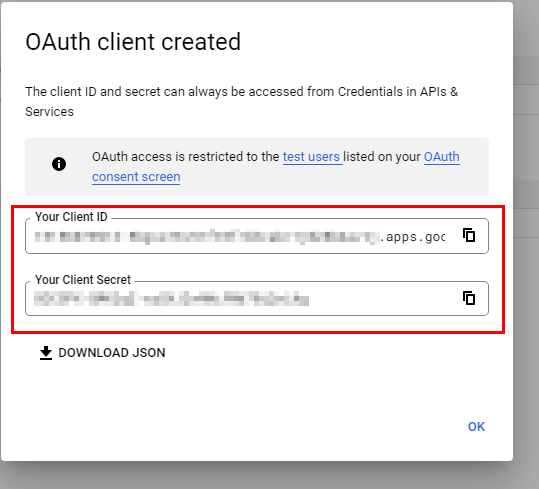
By Following the proper steps, you can generate Google Client ID and Client Secret Key by yourself. If you don't want to get into all these technical terms, you can always go for a software outsourcing company in India for a quick and cost-effective solution.
Frequently Asked Questions
- What is a Google App Client ID and Client Secret?
The authentication and authorization of applications to utilize Google APIs necessitate using exclusive identifiers known as Google App Client ID and Client Secret.
- Is using the same client ID and secret for multiple applications okay?
No, you cannot use the same client ID and Client for multiple applications because every app should have its own unique client ID and secret.
- Are there any restrictions on using my client ID and secret?
Ensure that your client ID or secret remains confidential, as they provide entry to your application's assets. Safeguard them within your code or configuration files.
- How can I get a Google App Client ID and Client Secret?
You need to create a project in the Google Cloud Console and enable the corresponding APIs for your application to obtain these credentials.
- Why do I need a Google App Client ID and Client Secret?
To integrate your application with various Google services, such as Gmail, Google Drive, or the YouTube API.
- Can I change my Google App Client ID or Client Secret later?
Yes, you can update your credentials anytime by returning to the Cloud Console and making the necessary changes.